
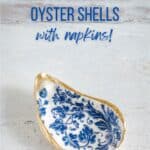
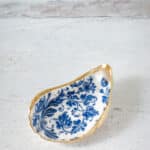
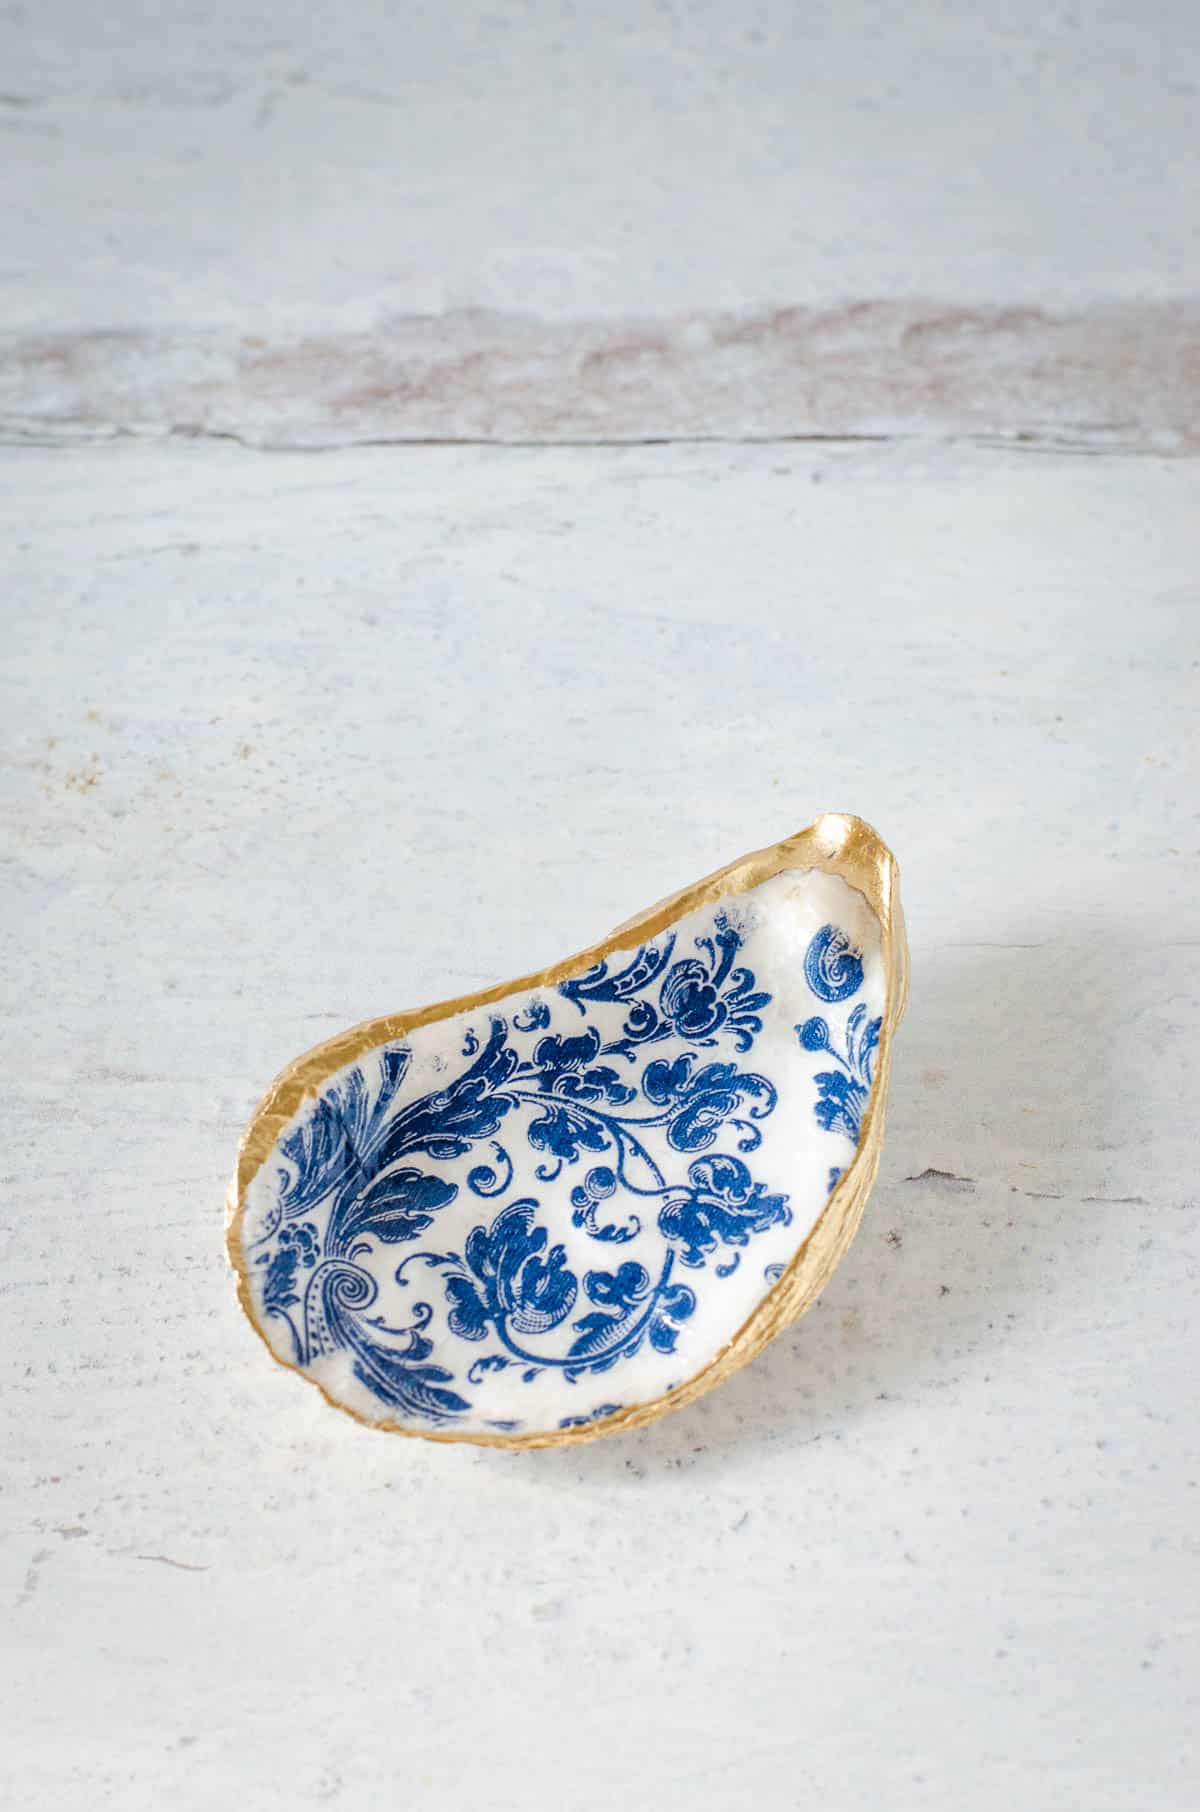
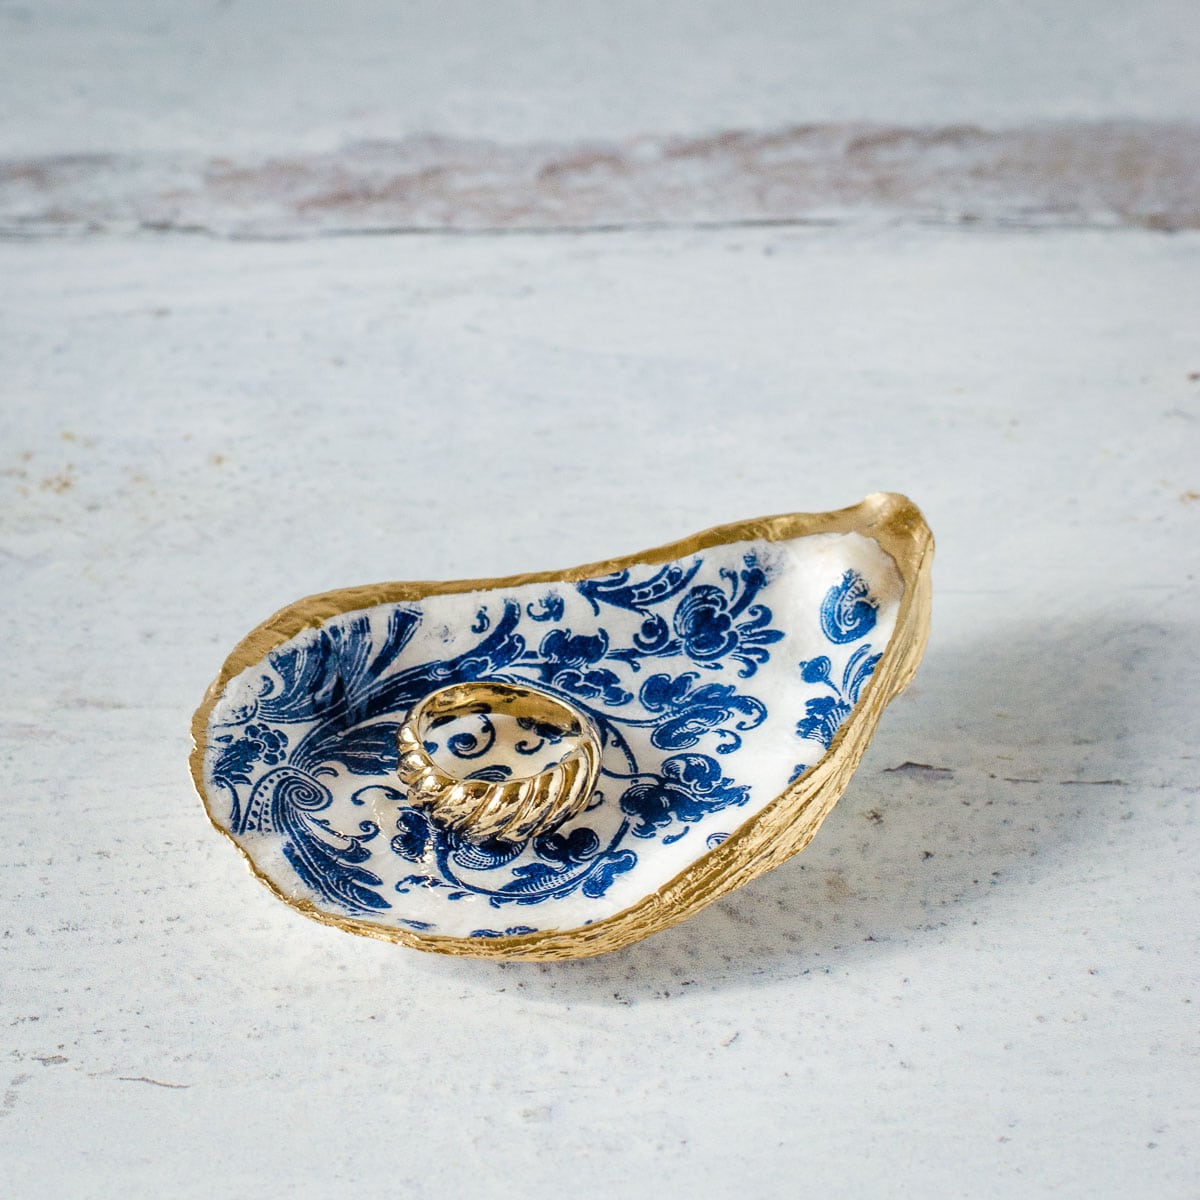
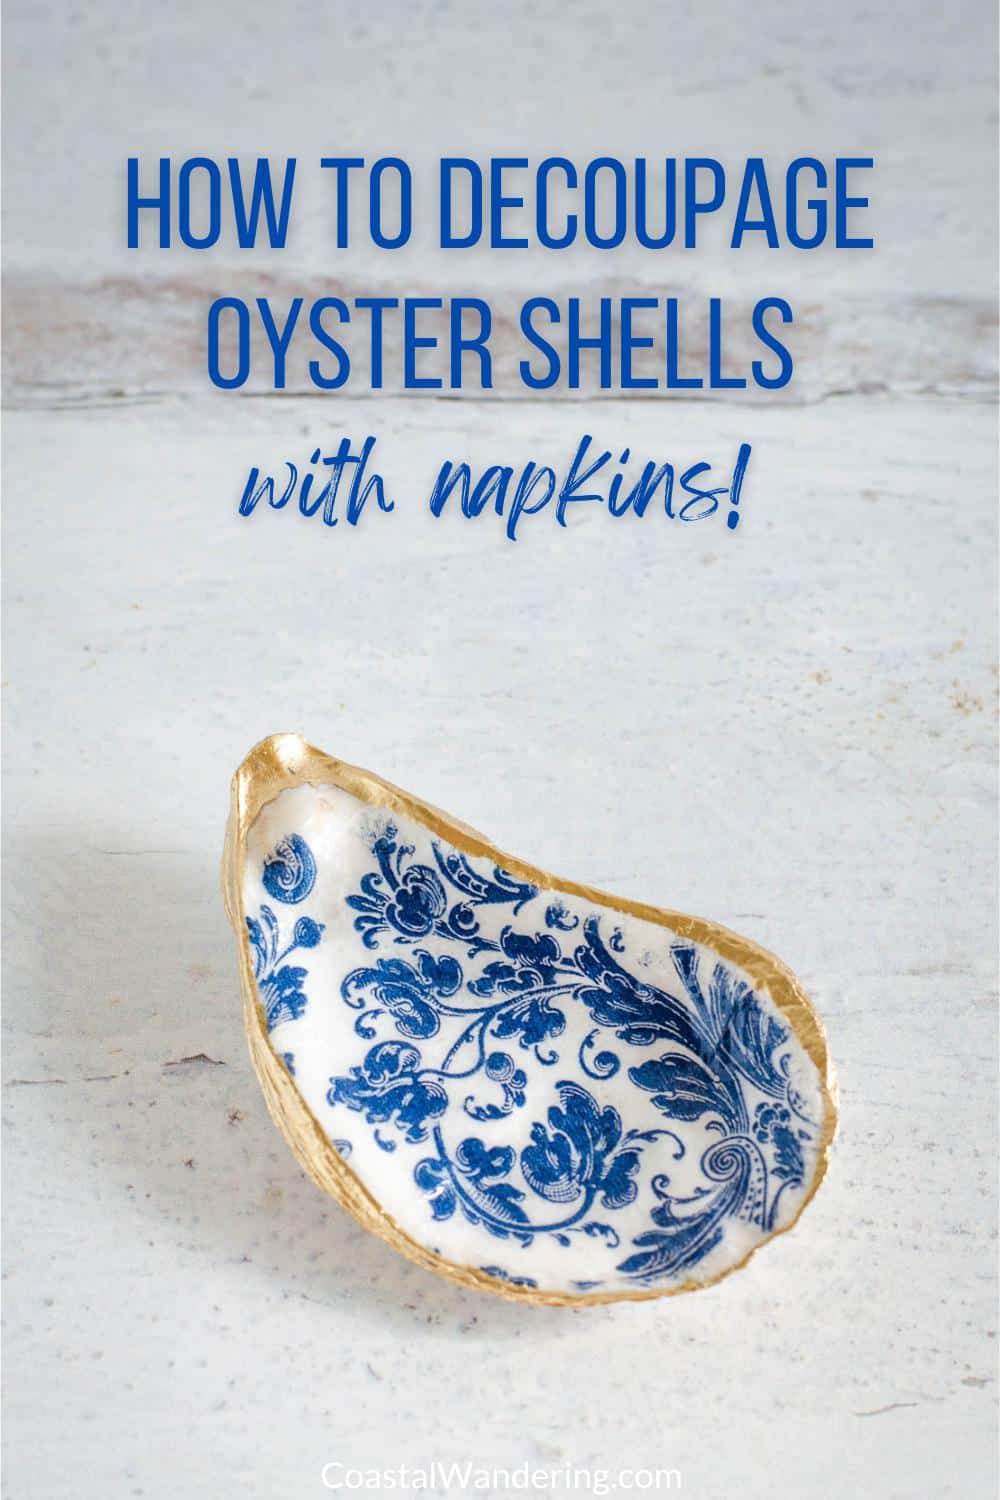
These easy decoupage oyster shells make a perfect trinket dish, souvenir or gift. Make them with napkins and shells found on your beach vacation or purchased at the craft store!
This oyster shell craft idea couldn't be easier! I use the ones I made to hold small items like earrings. You can also attach a ribbon and hang them or use them for oyster shell ornaments.
I made these decoupaged shells with oyster shells we picked up while walking on the beach. The key is to look for shells that are unbroken and have a smooth inside for adhering the patterned napkin.
Of course, you can always buy the shells online or at your local craft store.
Decoupage Oyster Shell Tutorial
Make your own DIY decoupage oyster shell trinket dish with this simple tutorial. Here's what you'll need to make it.
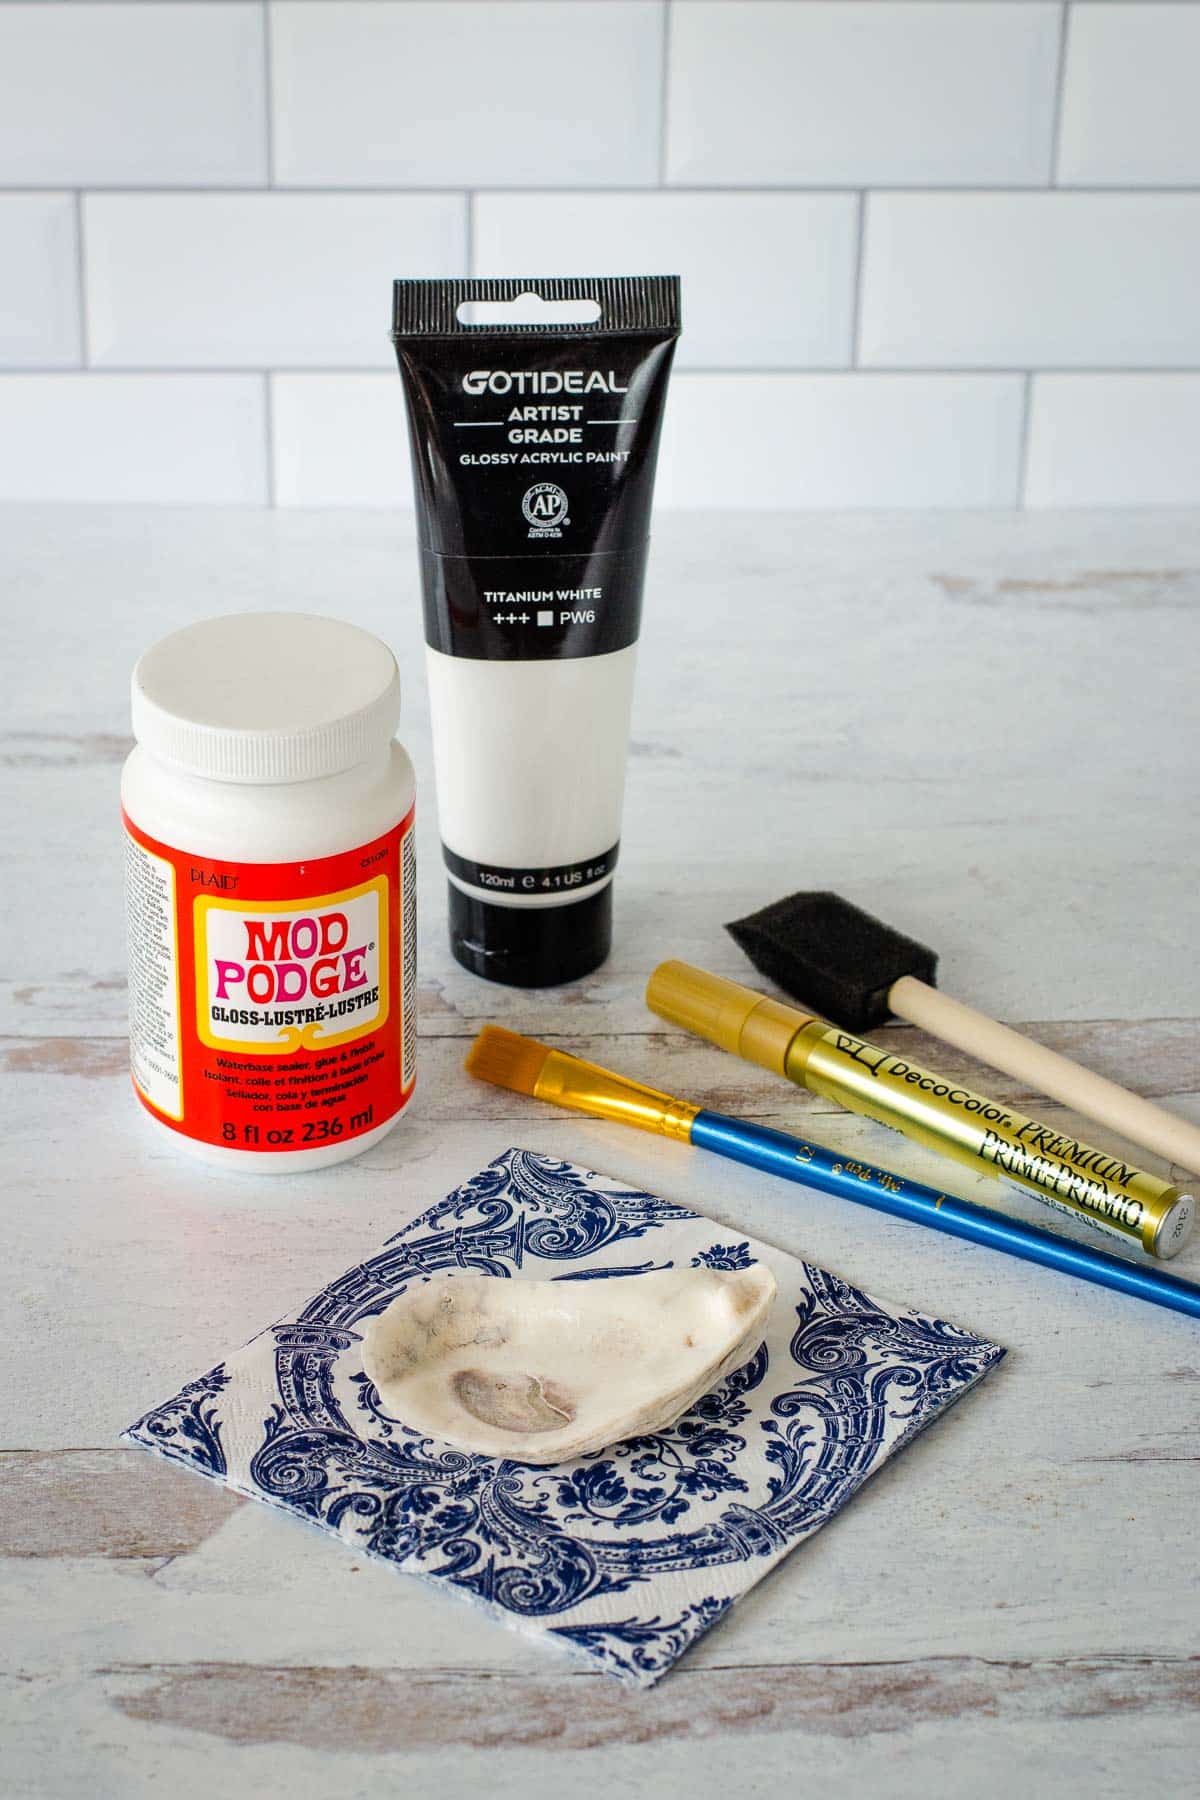
MATERIALS NEEDED
How to make decoupage shells
Be sure to start with clean dry shells. If you buy craft shells, they should come already cleaned and ready to use. If you are using found shells, be sure to clean them well. If you don't want to use bleach, you can clean them with vinegar (but don't let them soak) and wash them with dish soap. Let them dry thoroughly in the sun before using.
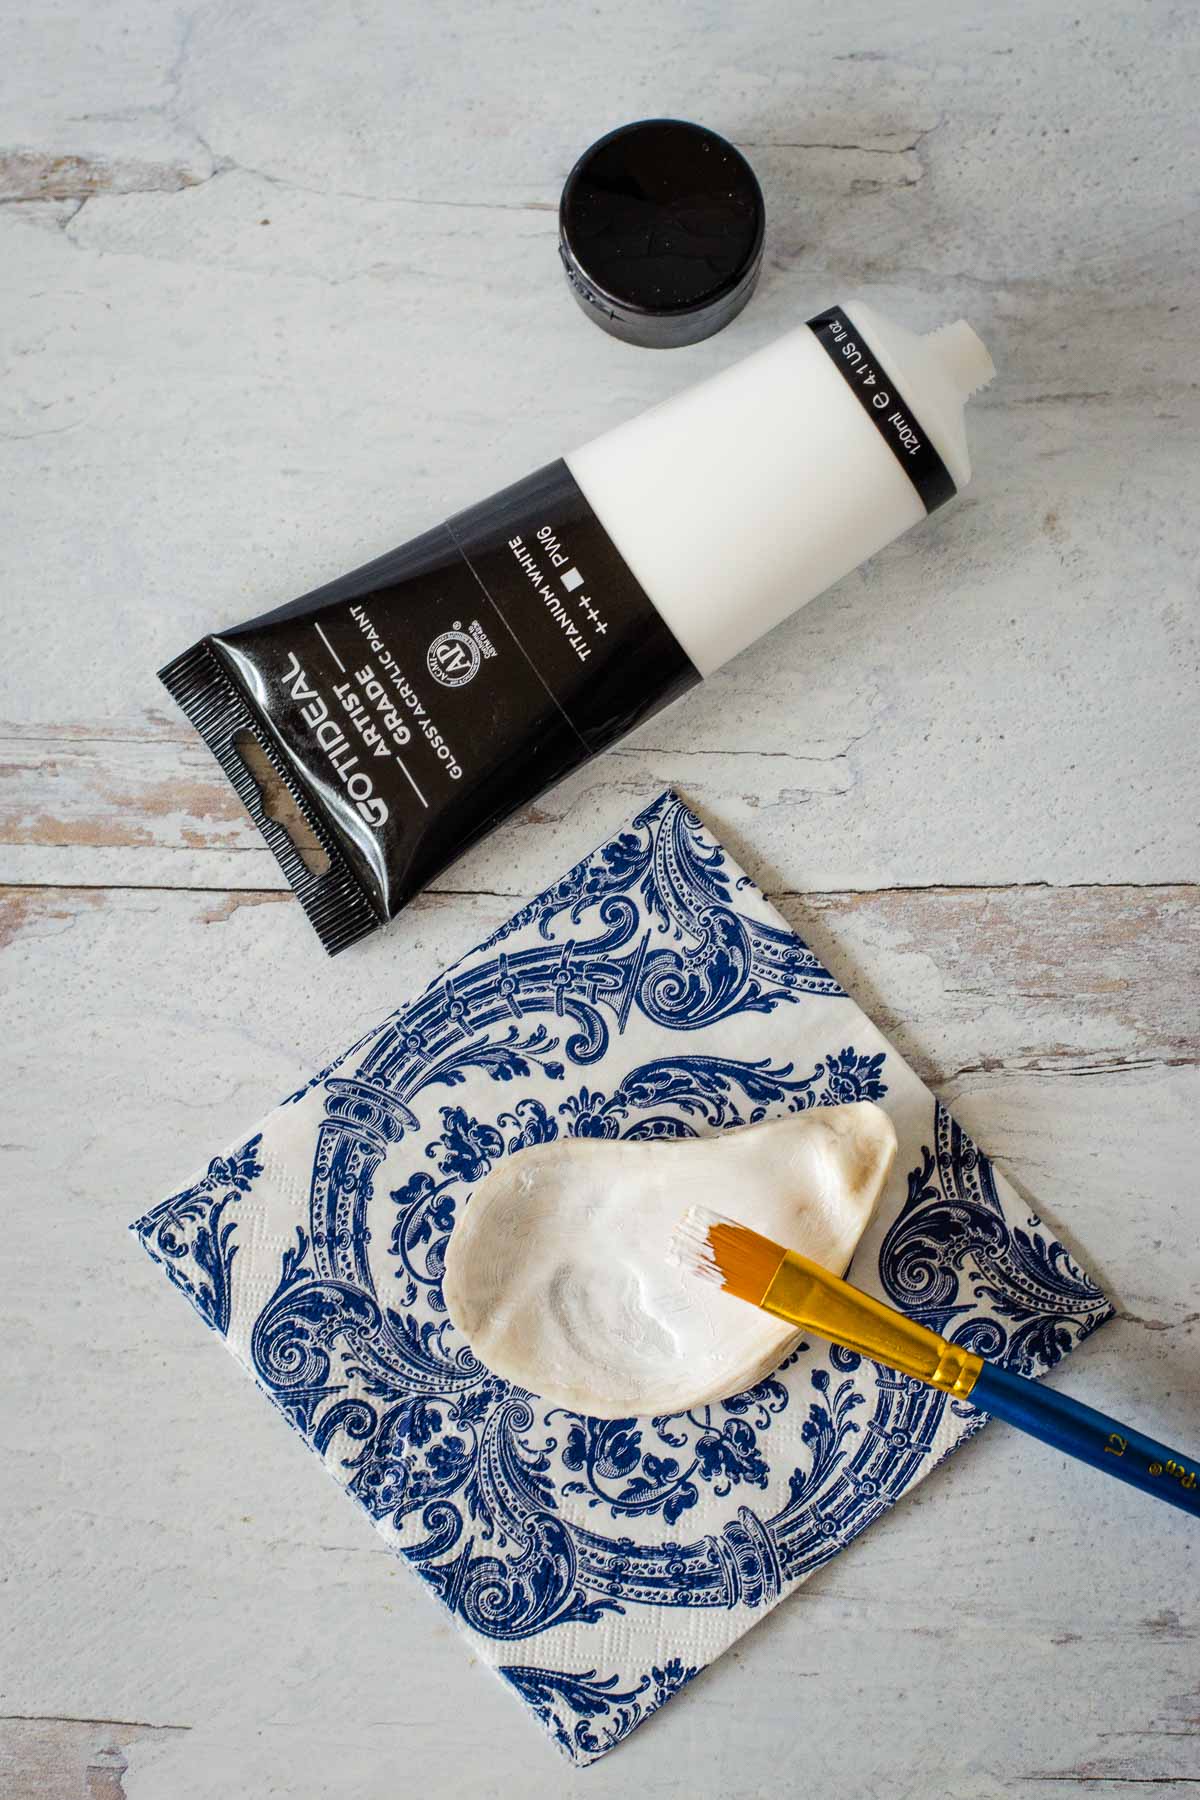
Start by painting the inside of the shell with white acrylic paint to cover any darker spots. This will give you an even background so nothing shows through the napkin.
Let the paint dry and repeat with a second coat if needed.
Next, separate the napkin into layers. Dry fit the top layer with the pattern on it to the inside of your oyster shell. Cut it to the size of the outside edges of the shell.
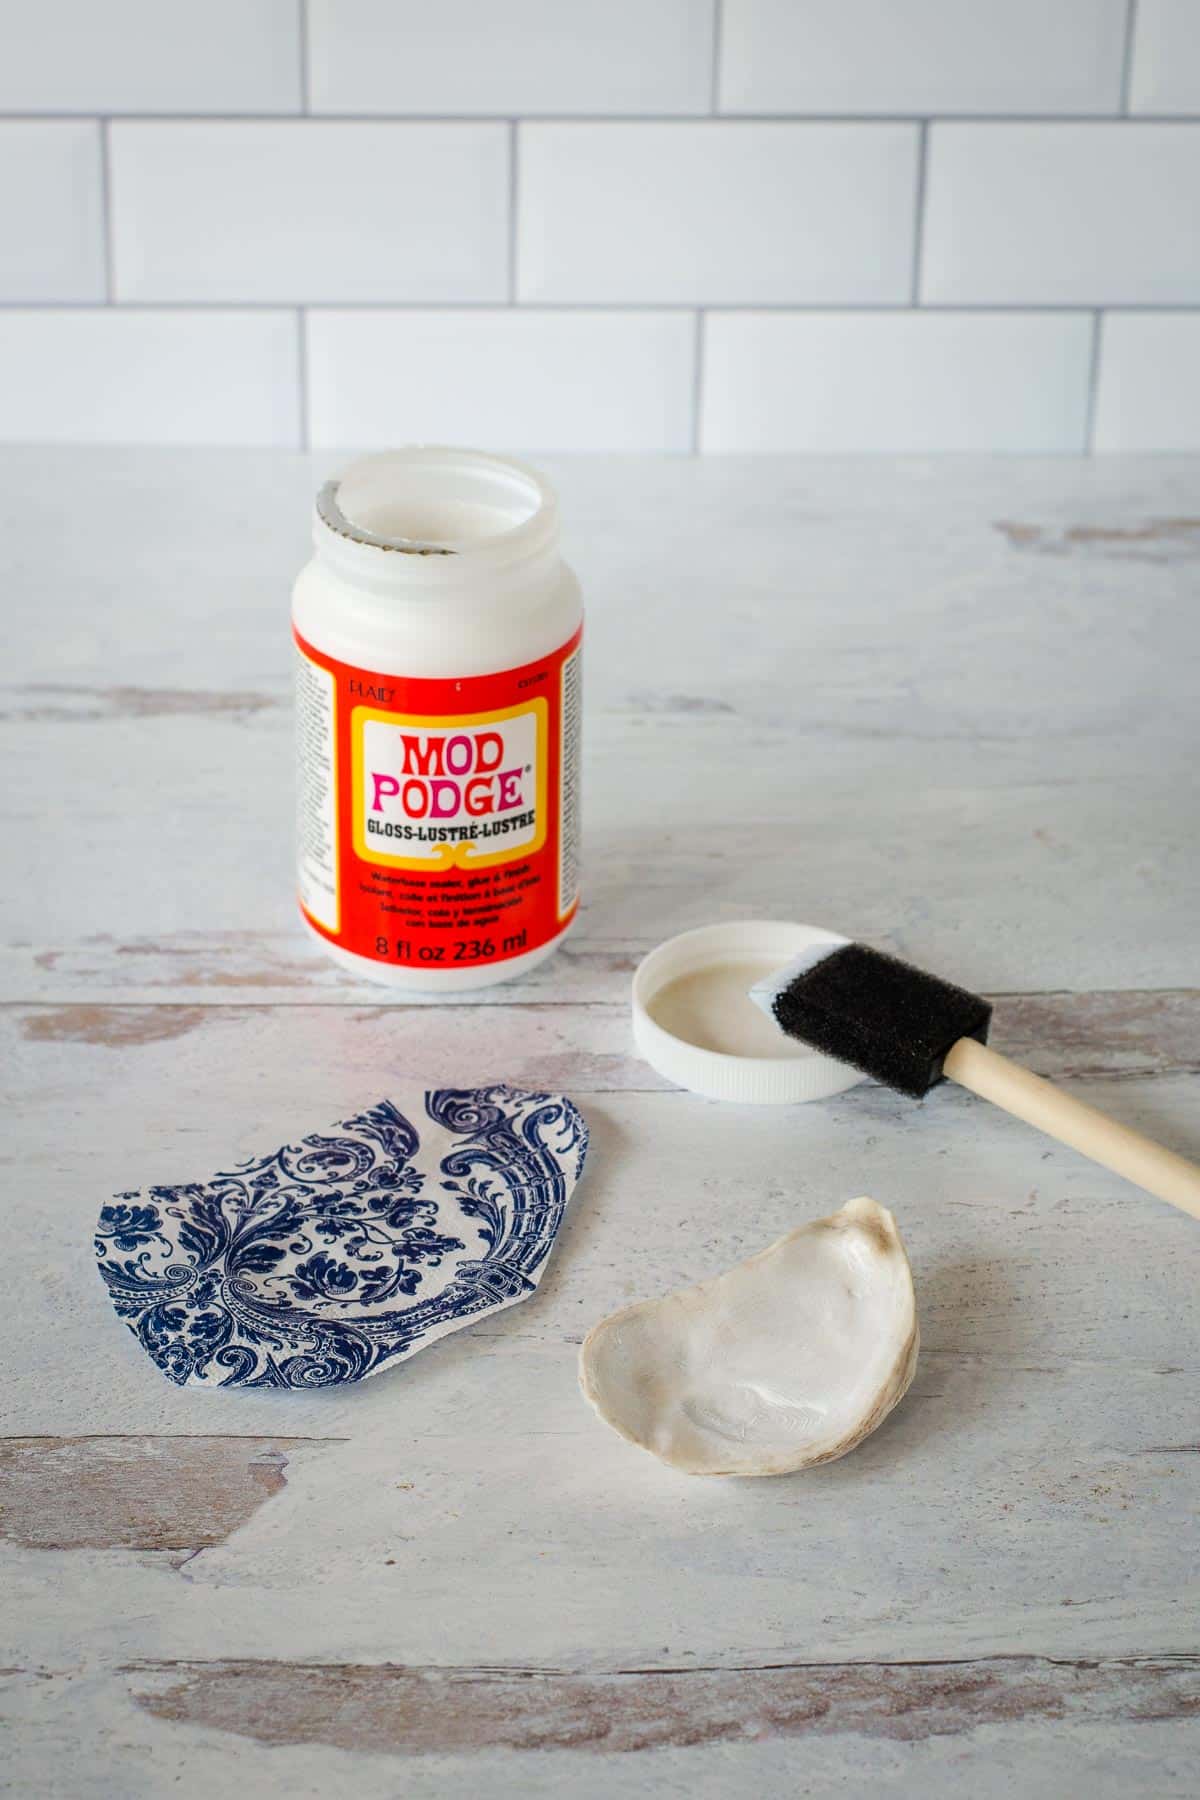
Once you cut the napkin to size, spread an even layer of Mod Podge over the painted inside of the shell.
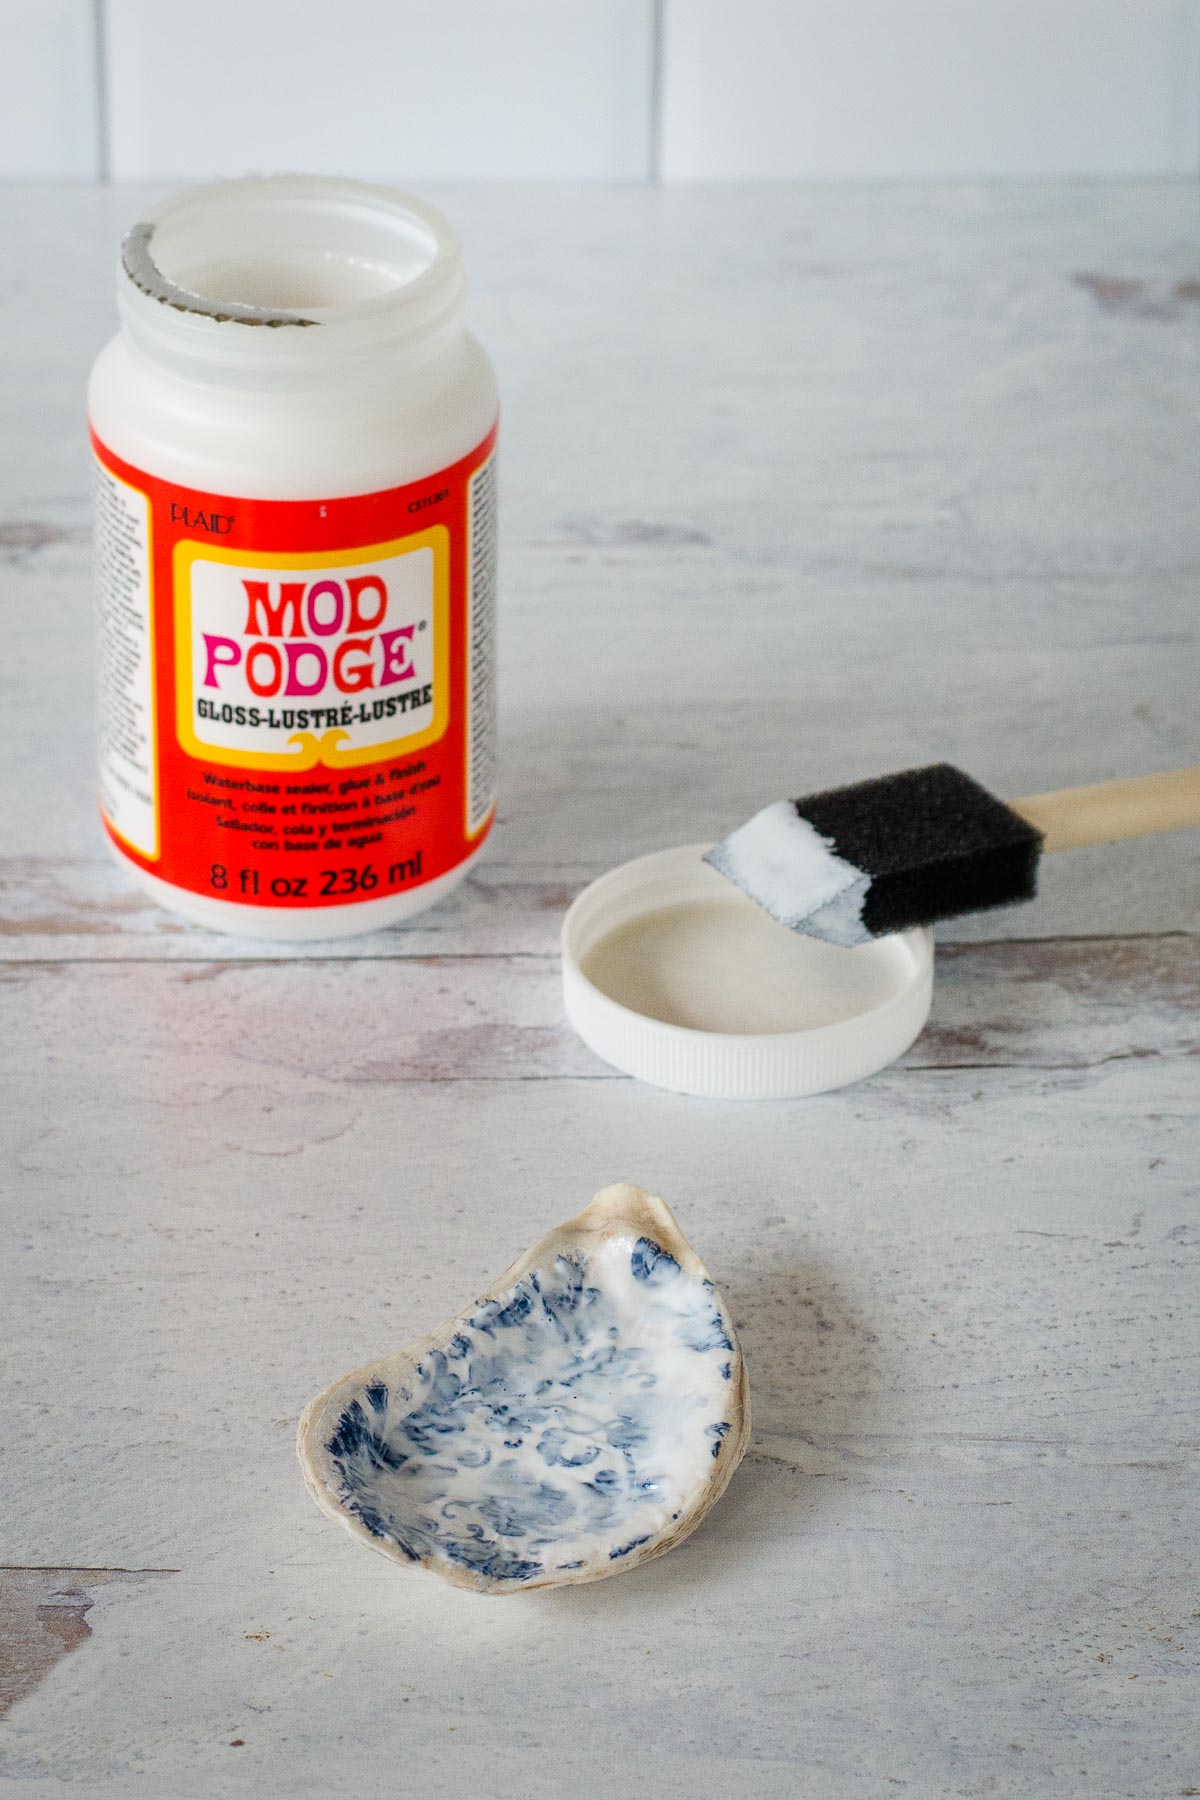
Carefully place the napkin inside of the shell, smoothing any wrinkles. Trim any excess napkin around the edges.
Spread a thin layer of Mod Podge over the top of the napkin and let it dry. Repeat with one or two more coats, until it has a smooth gloss.
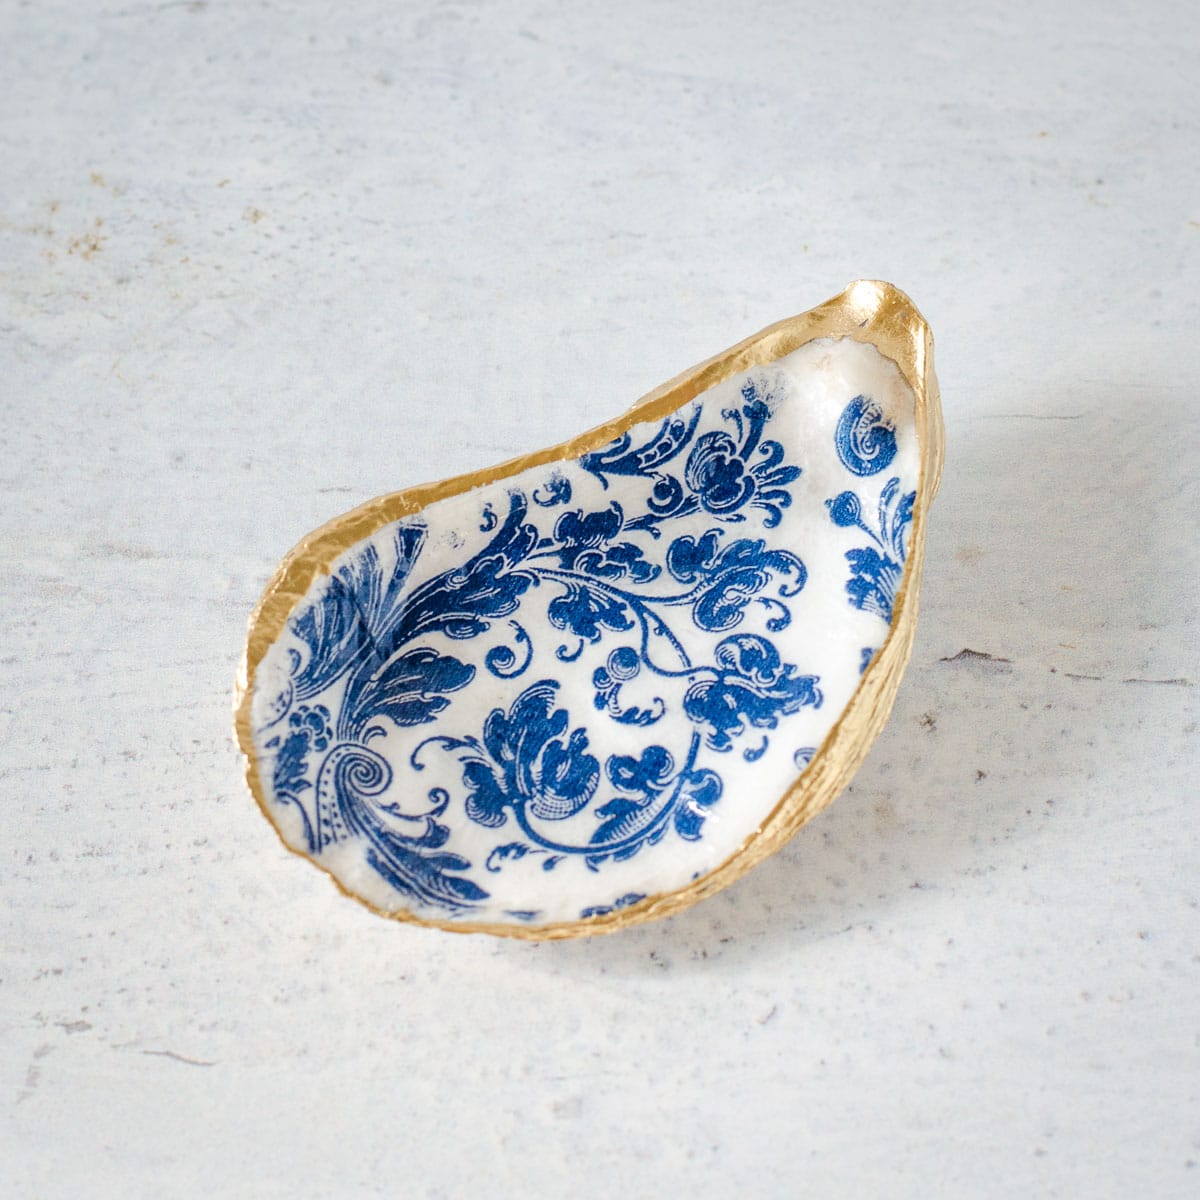
Once it's dry, it's time to add the finishing touches. Using a metallic paint marker is the easiest way to paint the edges of the shell gold. This may take a couple of coats.
That's it - so simple! Display your shells on a table, bookshelf or countertop. Use them for a jewelry dish or group several together for a desk organizer.
Variations to try
Try some of these design ideas to change up this easy seashell craft.
With so many options for napkins, you can make decoupaged shells to match any decor, color or mood. I used a Blue Willow pattern, but here are a few more ideas.
Try different types and shapes of flat seashells, the possibilities are endless. Here are a few to get you started:
Try a different color paint to accent your oyster shells. You also can paint the back of the shell a solid color instead of leaving it natural.
And of course, if you don't want to make your own trinket dishes, you can always buy pre-made ones like these.
Whether you DIY or buy them, decoupaged oyster shells are a perfect addition to your coastal home decor or a unique last-minute gift!
More easy shell crafts
- Sand Dollar Christmas Ornaments
- How To Make a Seashell Wreath
- Starfish Napkin Rings
- 20 Easy Seashell Crafts
How To Decoupage Oyster Shells
Materials
Instructions
- If you're using found shells, wash and let dry completely.
- Paint the inside of the shell with white acrylic paint to cover any darker spots. Let dry and repeat if needed.
- Separate the napkin into layers. Dry fit the top layer with the pattern on it to the inside of the oyster shell.
- Spread an even layer of Mod Podge over the painted inside of the shell. Carefully smooth the napkin in place, avoiding wrinkles. Trim any excess napkin around the edges.
- Spread a thin layer of Mod Podge over the top of the napkin and let it dry. Repeat with one or two more coats, until it has a smooth gloss. Let dry.
- Use the gold metallic marker to paint the edges of the shell. Let dry and repeat if needed.


Donna says
These are very easy to read and follow instructions 🌸
Lisa says
I'm so glad you think so!
Jenni says
How do you avoid wrinkles? My daughter and I tried this but we couldn’t get some wrinkles out.
Lisa says
It takes some finessing, but I gently push the wrinkles out of the napkin while it's still wet. Unfortunately, once it starts to dry they're not going anywhere.
Montserrat Barberà says
How do you prepare and smooth tha back Side?
Montserrat.