
These easy DIY coasters are a cute, fun way to bring a little coastal vibe into your home. Whether you're sprucing up a sunroom or adding a pop of color to the kitchen, these coasters instantly add that laid-back, seaside feel.
You only need a few budget-friendly supplies-clay saucers, nautical rope, and paint-to get started. The best part? You can customize them to match your personal style.
For more ways to add coastal charm to every corner of your home, check out these coastal decor ideas when you're done crafting.
Here's what you'll need
Make your own DIY clay and rope coasters with this step-by-step guide. Here's what you'll need to make it.
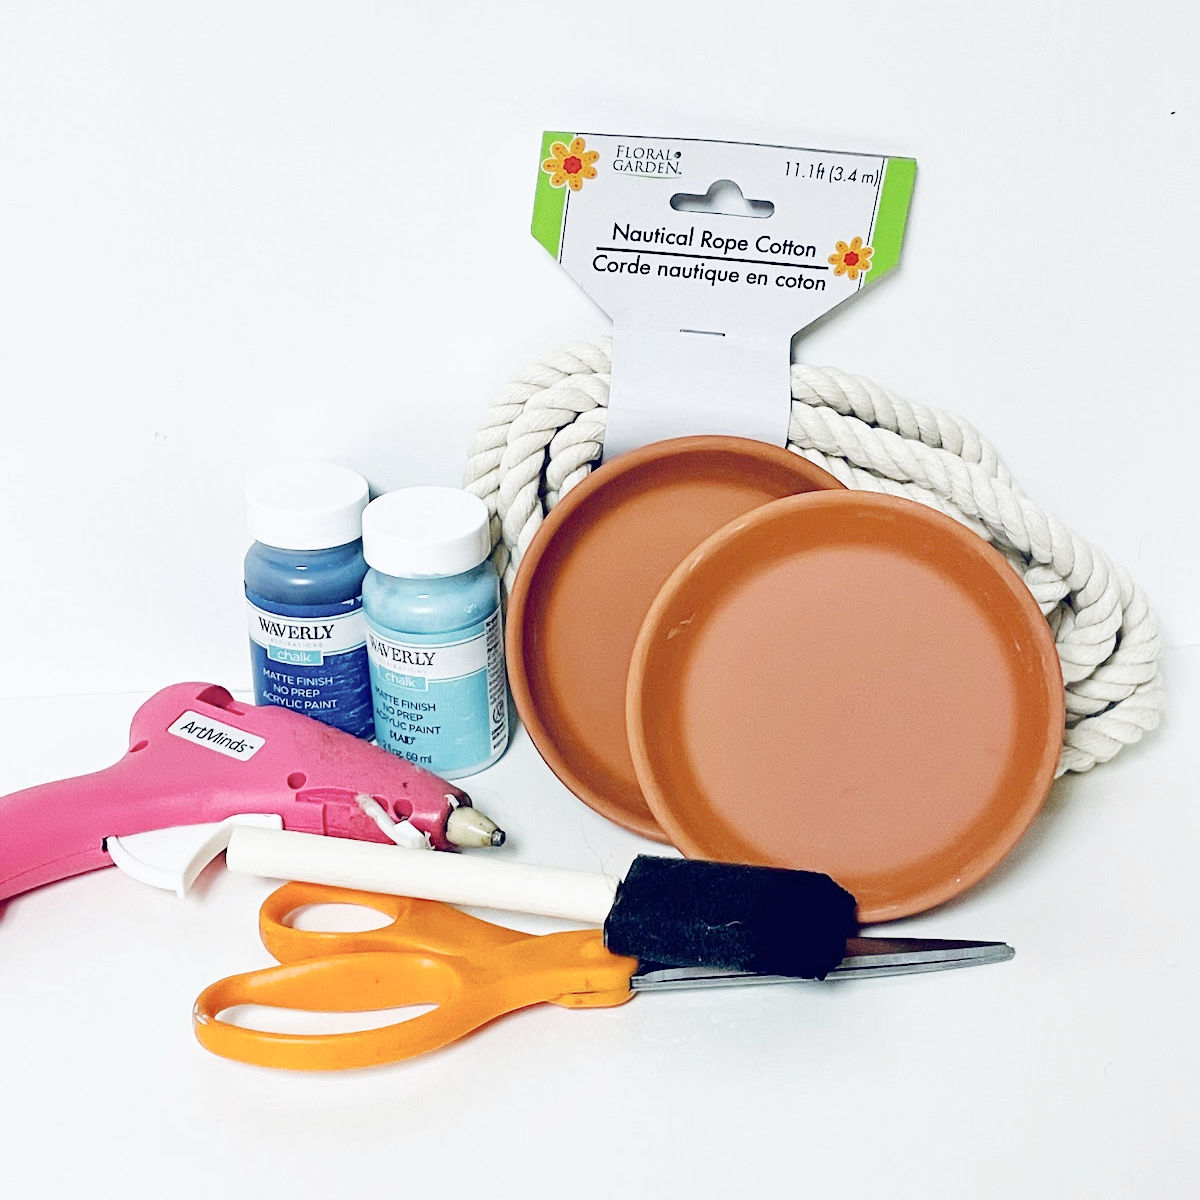
MATERIALS NEEDED
- terra cotta clay saucers (4-inch diameter)
- Waverly Chalk Paint (Ocean and Pool colors) You can substitute regular acrylic paint, but you may need extra coats for full coverage.
- sponge paint brushes
- hot glue gun with glue sticks
- nautical cotton rope
- scissors
Step-by-step instructions
It's easy to make these DIY Coastal Coasters. Here's how to get that beach-inspired look in just a few simple steps.
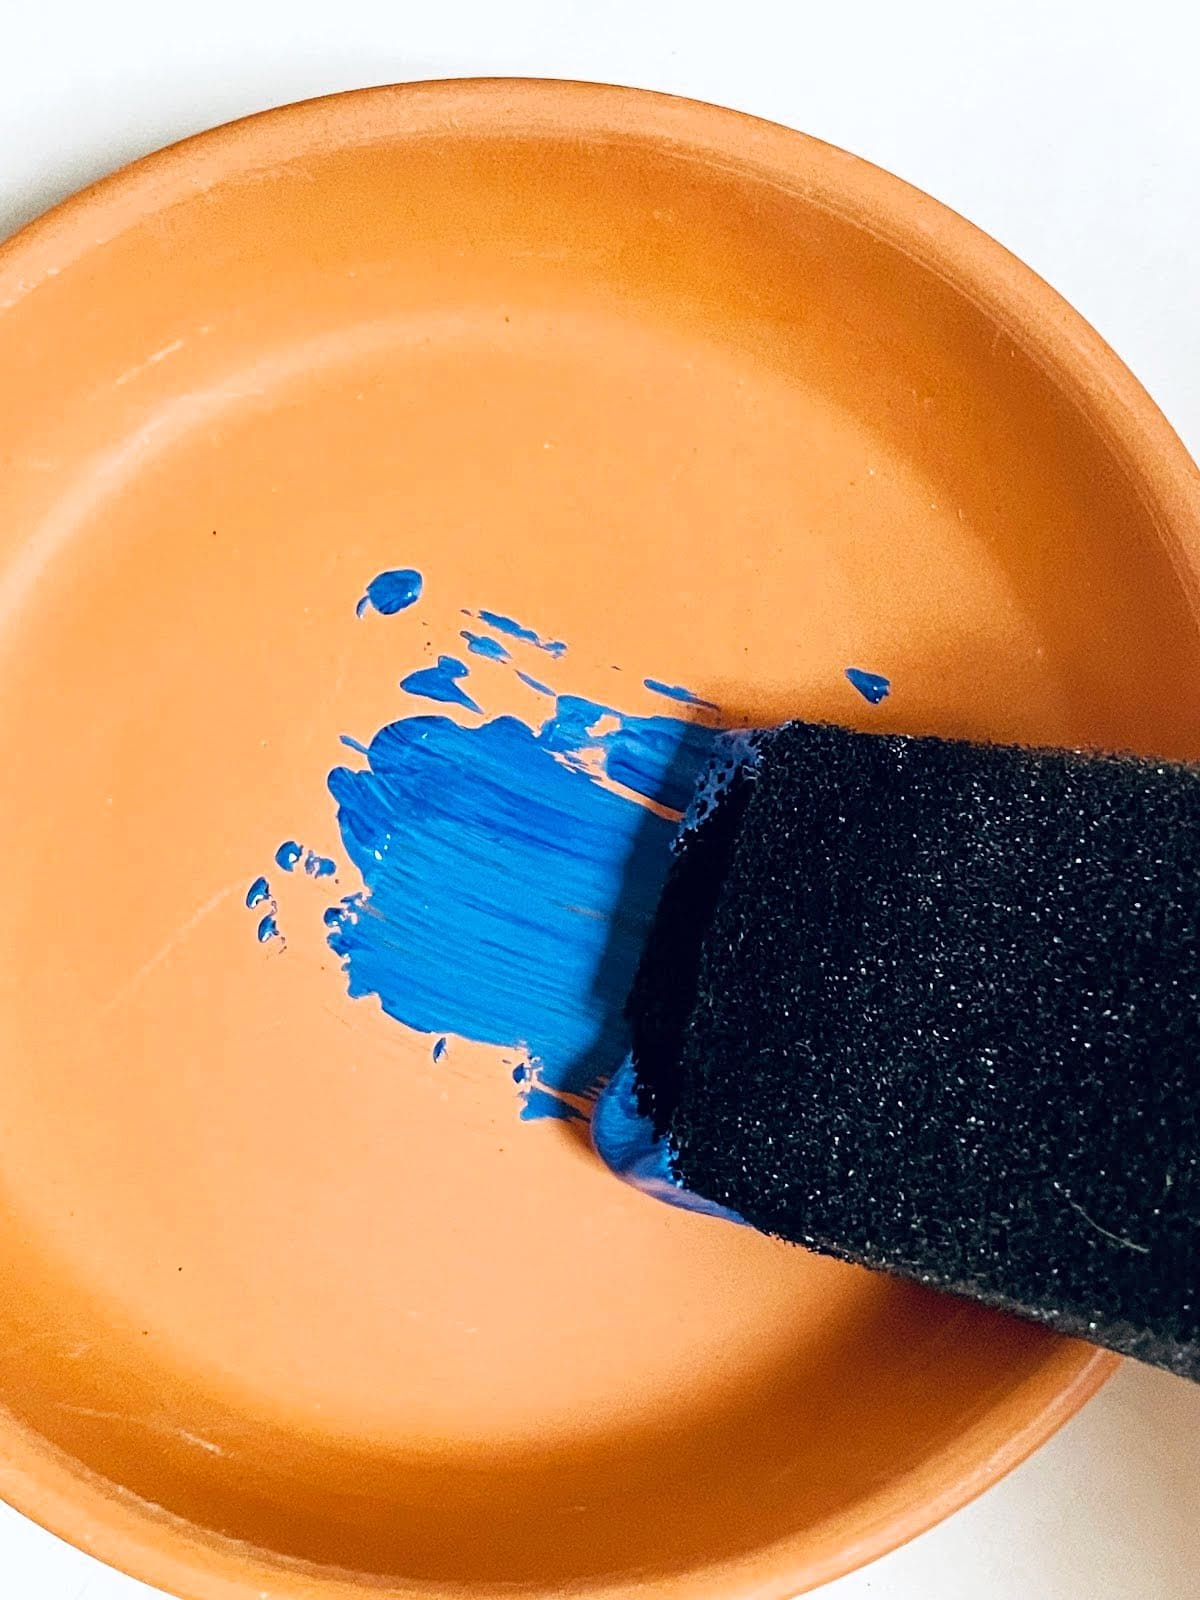
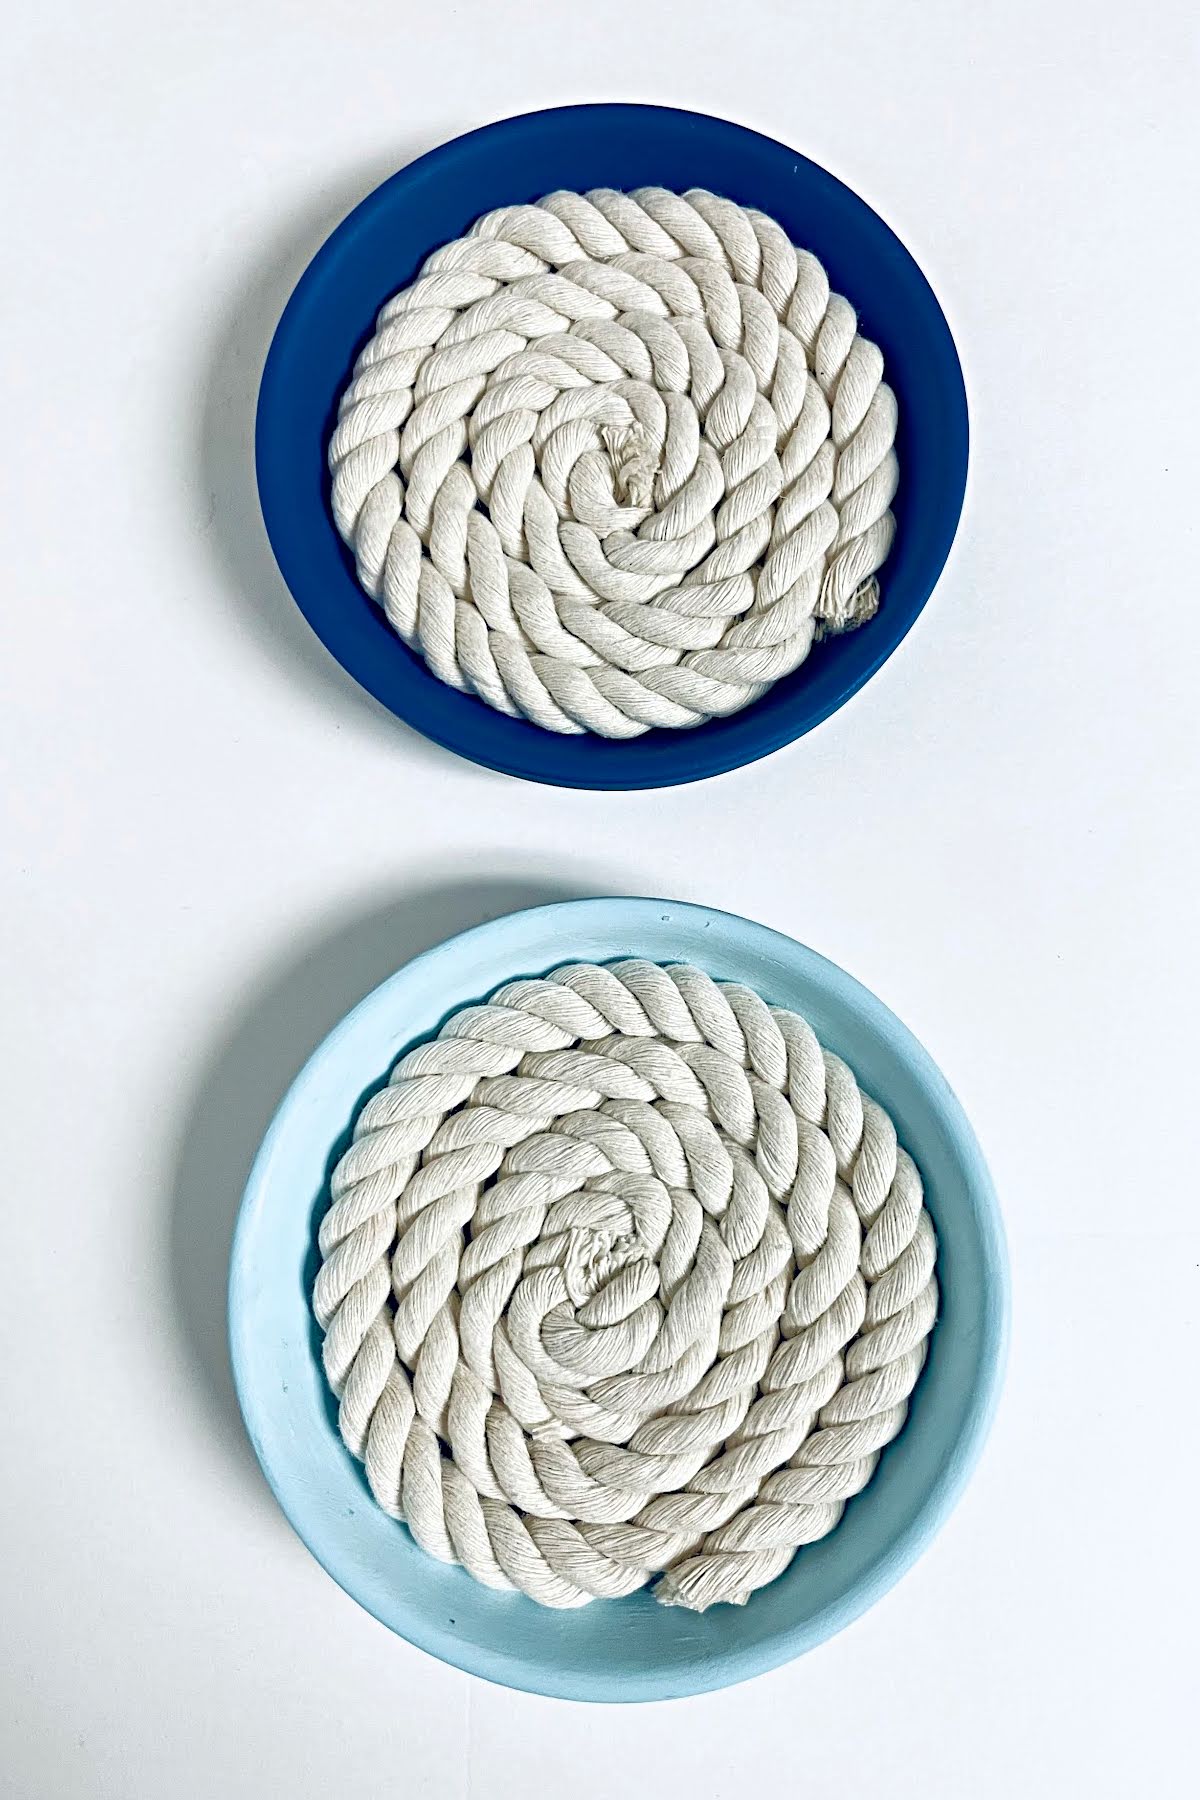
Paint the saucers
Paint the inside of the saucer and the outside rim of the saucer. Paint one clay saucer in a layer of "Ocean" chalk paint and the other in "Pool" or use your chosen colors.
Let the first coat dry, then touch up any thin areas for solid, even color. Chalk paint gives great coverage, but if you use acrylic paint, you may need to apply a couple of extra coats to fully cover the natural terra cotta shade.
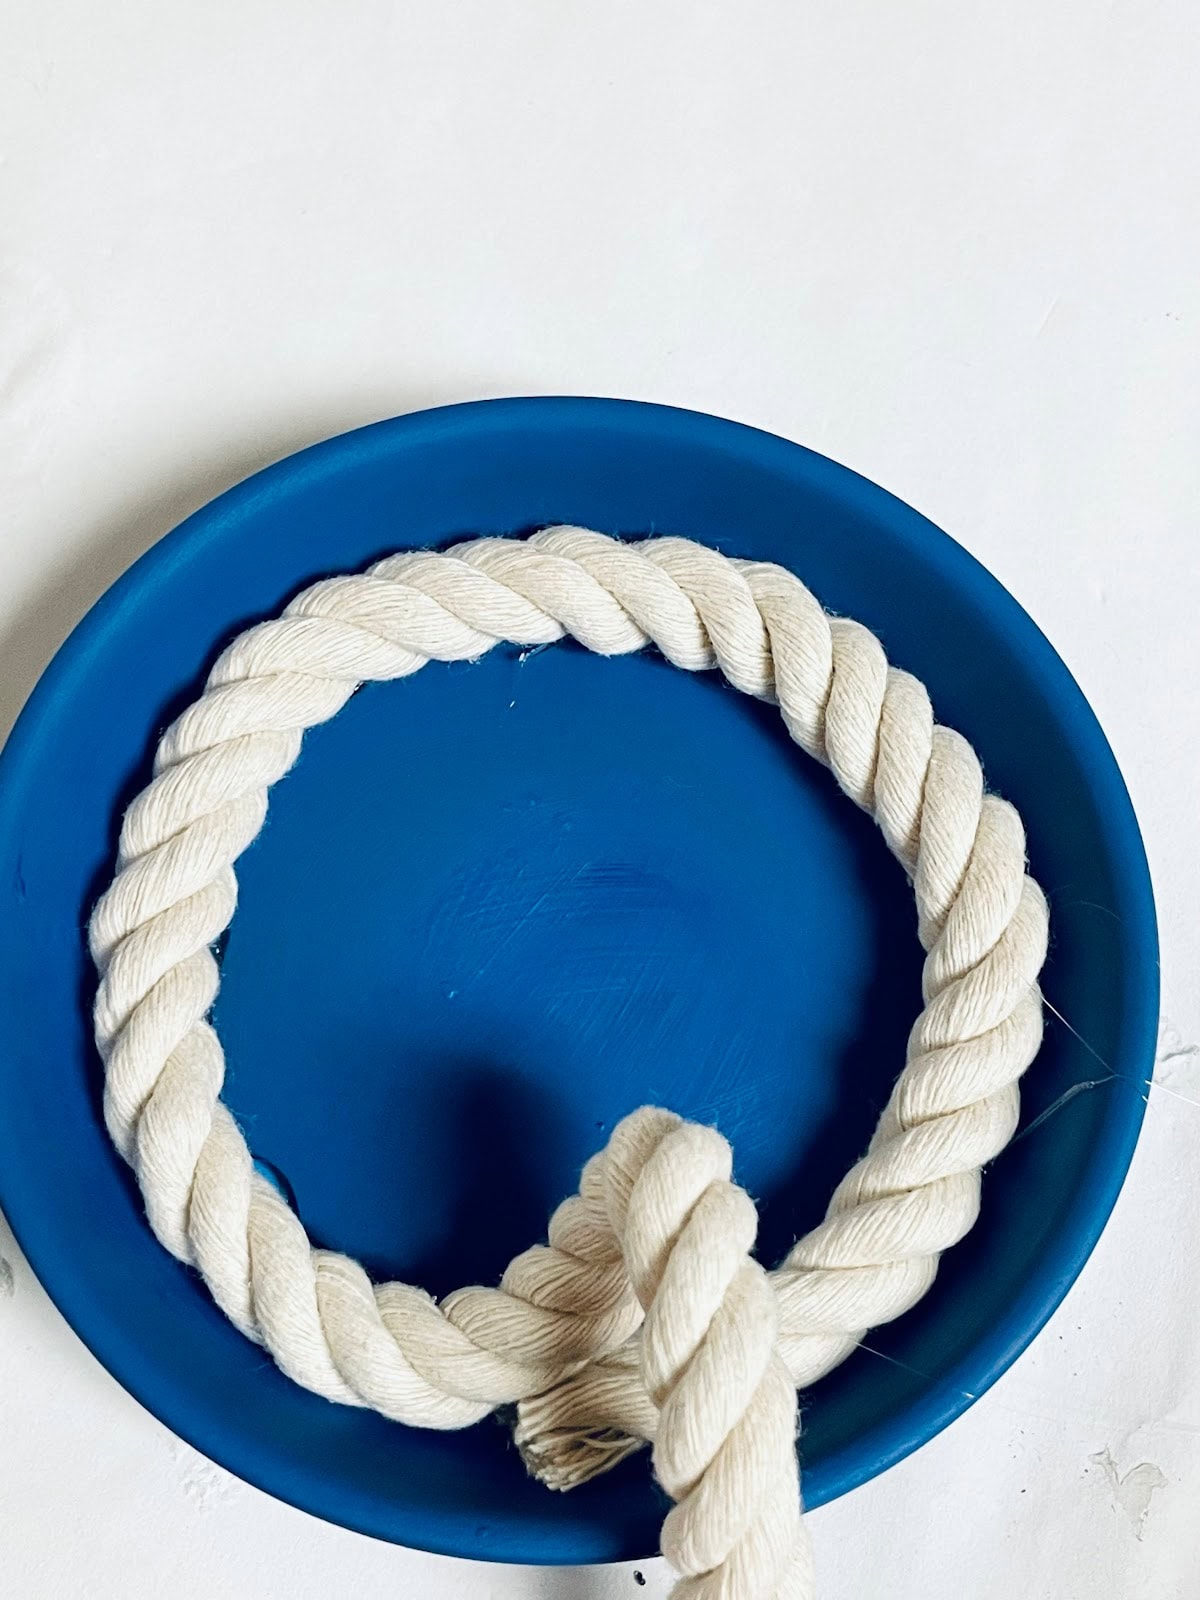
Attach the rope
When the saucers are dry, heat up your glue gun. Apply a thin line of hot glue along the inner rim of one saucer. Immediately lay the end of your nautical cotton rope right on the glue, holding it for a second or two until it sets.
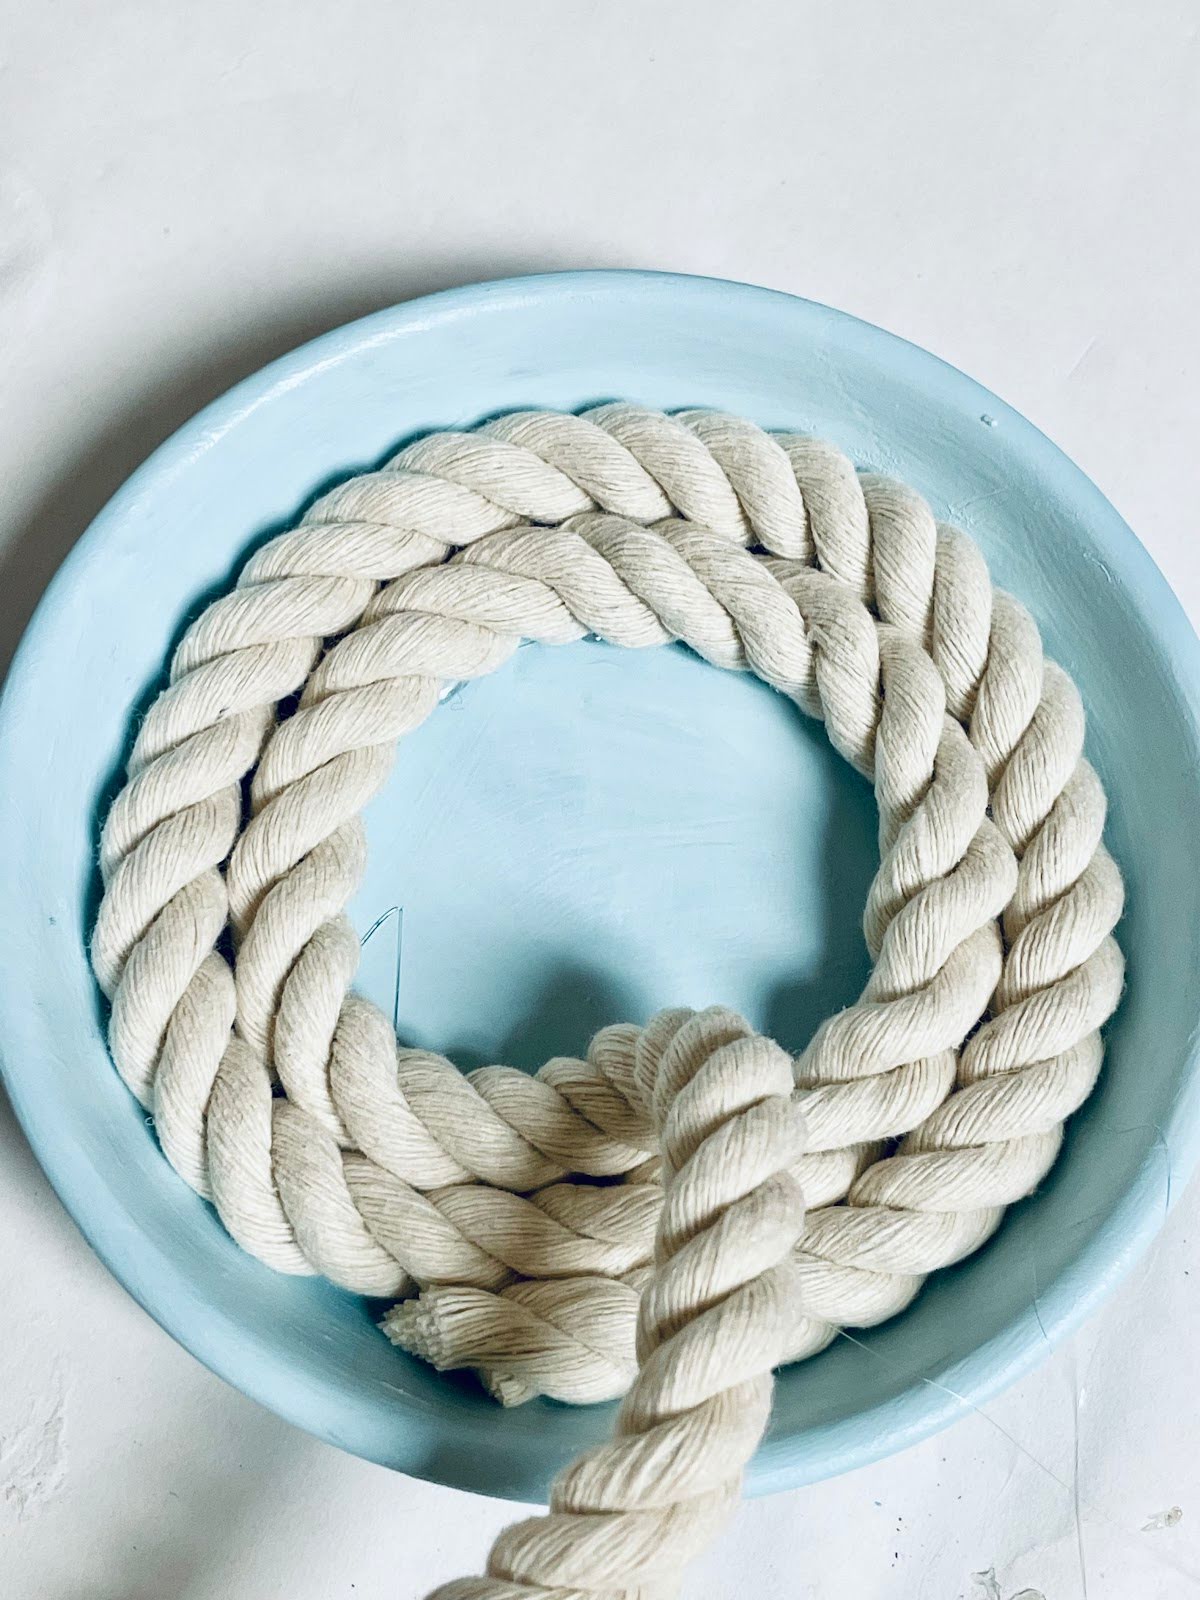
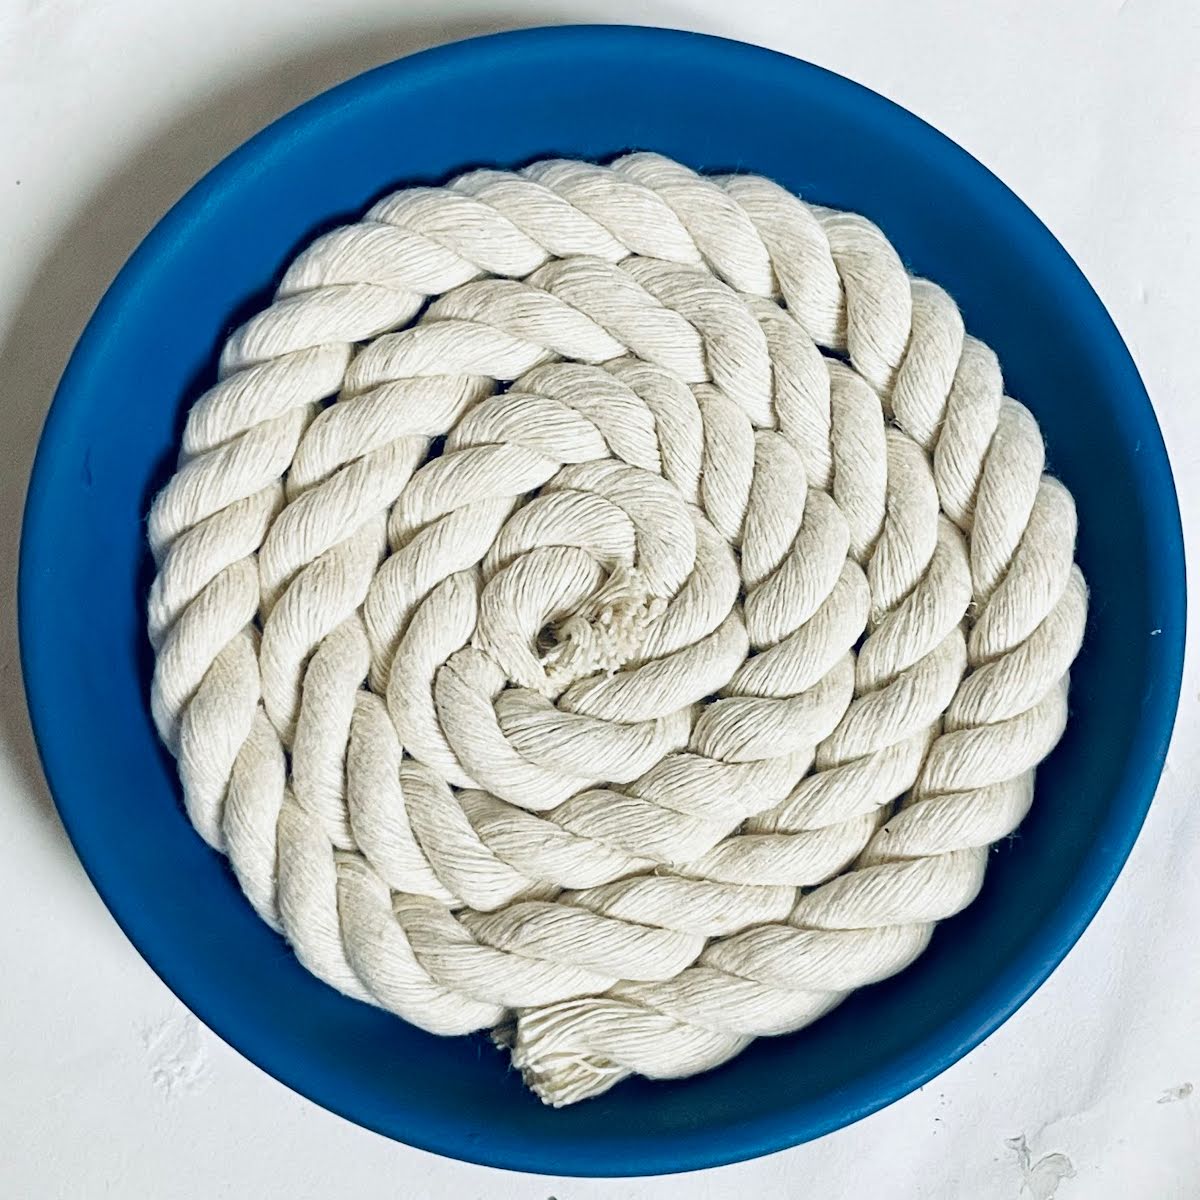
Keep adding glue and pressing the rope around the rim, working inward in a spiral, until you reach the center.
Press the rope gently into place for a neat, even spiral.
When you reach the middle, trim the rope with scissors for a flush finish.
Clean up and carefully remove any excess glue if needed.
Fun Ways To Customize
Once you've made your first set, don't be surprised if you want to make more. These ideas help you switch things up while keeping that easy, breezy coastal style.
- Switch up the paint colors - Try a sandy beige, seafoam green, or even coral. Or blend two shades together for an ombre effect.
- Add nautical touches - Use jute rope for a rougher texture, add mini seashells around the edge, or tie extra rope into sailor's knots for accents.
- Try stencils or stamps - Stamp on tiny anchors, palm trees, or monograms around the edge for an extra personal touch.
- Mix and match - Paint each coaster in a different color or use different rope textures to create a casual, collected look.
However you style them, customizing your DIY coasters will make them a perfect fit for your space.
More easy coastal crafts
Looking for more simple ways to bring a beachy vibe into your home? These coastal craft ideas are just as relaxing-and just as fun.
Painted Beach Stones: Collect smooth stones (or grab some from a craft store), paint them in ocean shades, and use metallic paint pens to add coastal accents. They make cute paperweights or bowl fillers.
Rope-Wrapped Jars: Use any leftover nautical rope to wrap around jars or vases. Glue it in place as you go and fill with faux beach grass or greenery.
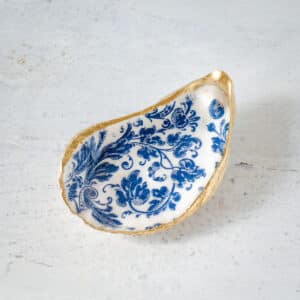
Decoupage Oyster Shells: Give empty oyster shells a pretty upgrade with a little decoupage using patterned paper or napkins. They make beautiful trinket dishes or decorative accents on shelves and tabletops.
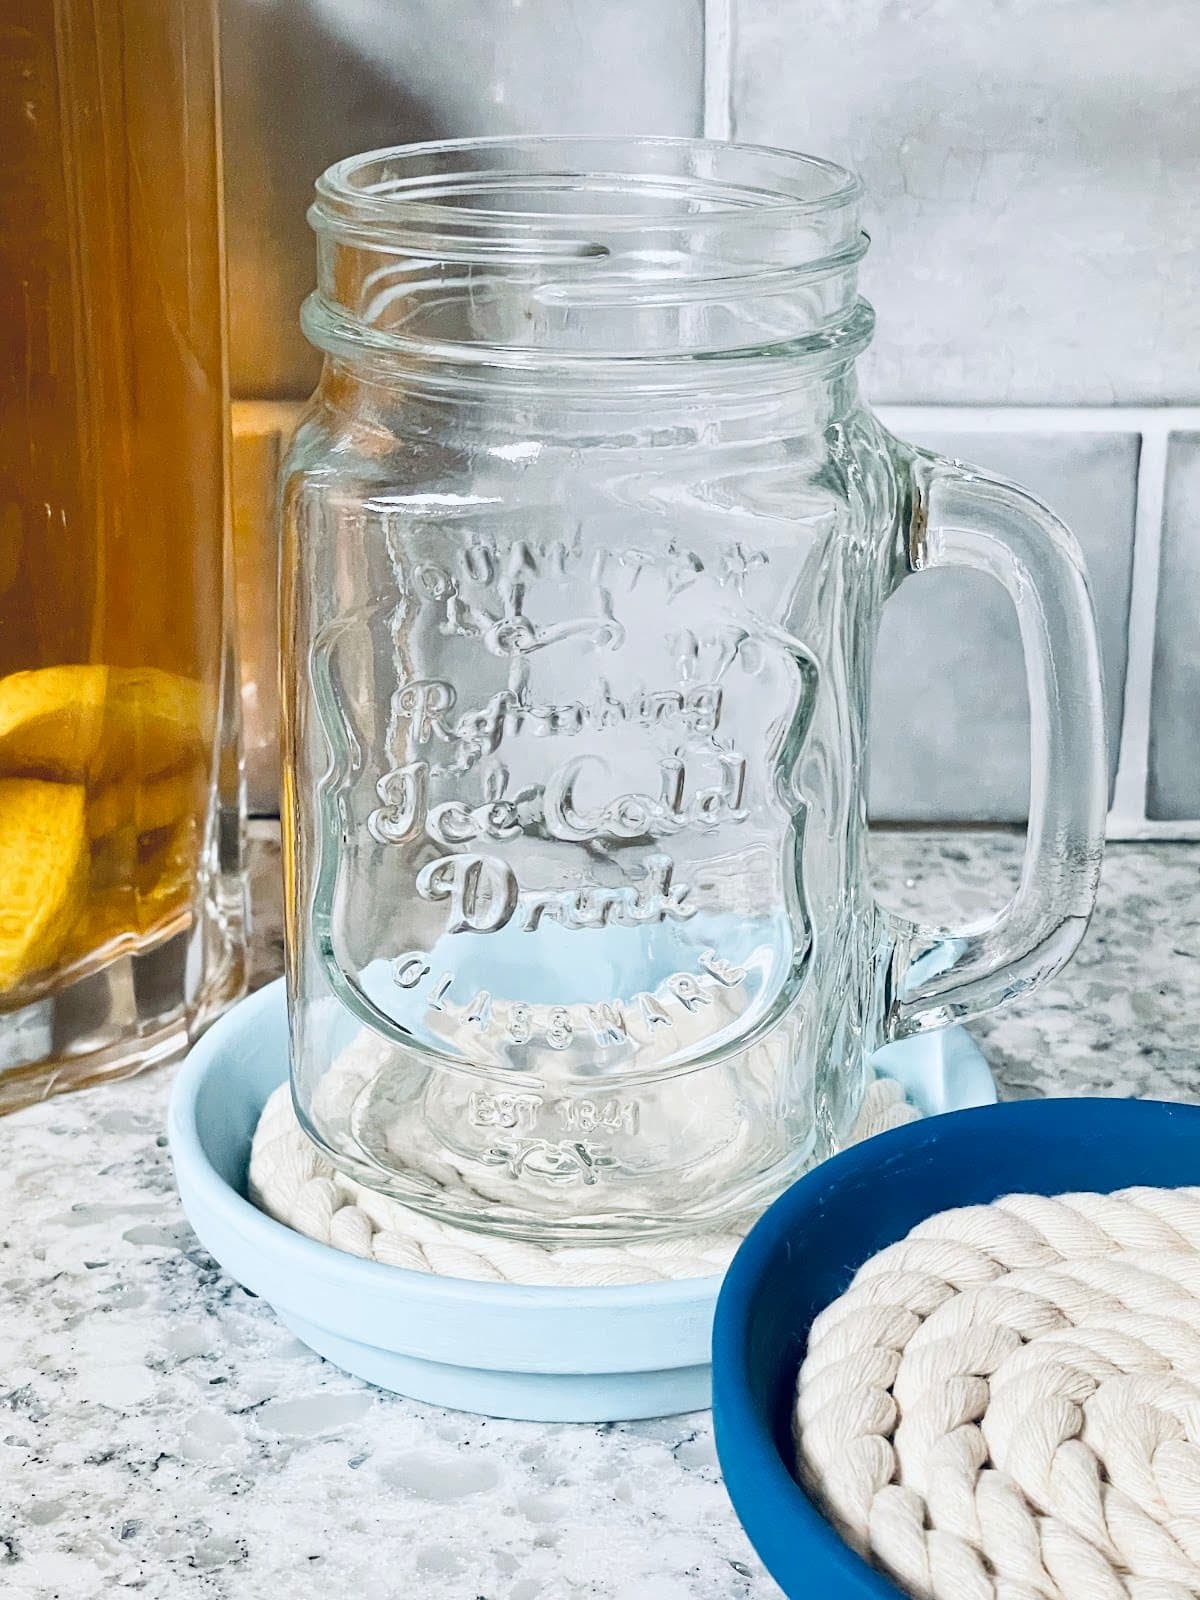
DIY Coastal Coasters
Equipment
- scissors
Materials
- terra cotta clay saucers 4-inch diameter
- Waverly Chalk Paint Ocean and Pool or your favorite colors
- nautical cotton rope
Instructions
- Paint the inside of the saucer and the outside rim of each saucer. Paint one with Ocean and one with Pool or use your favorite colors. Let the first coat dry, then touch up any thin areas for solid, even color.
- Once the paint is completely dry, apply a thin line of hot glue along the inner rim of one saucer. Immediately lay the end of the rope on the glue and pressing around the rim. Continue adding glue and pressing the rope, working inward in a spiral, until the entire center of the saucer is covered.
- Using the scissors to trim the end flush for a neat finish. Remove any excess glue.

Leave a Reply